Tuesday, August 30, 2011

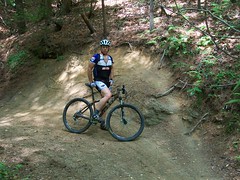
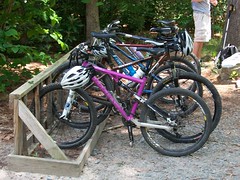
Avery Trail: DH Video

Avery is officially my favorite trail at Crested Butte Mountain Resort! Stay tuned for a full-length blog post about my experience shredding CBMR!

Read more...

Thursday, August 25, 2011

Thrifty Thrashing Tip #7: DIY Chainstay Protector

The term "chain slap" refers to the noise you hear when the chain slaps against your chainstay as you bash through rocks and other technical obstacles. Not only is this an obnoxious noise, but the repeated impact of the chain against the frame can chip the paint and metal (or carbon) of your chainstay, causing considerable damage over time.

To combat this, people have long been using various sorts of padding to protect their chainstays. You can buy a protector for anywhere from $5 to $30, or by using this simple process you can protect two mountain bikes for the cost of one flat innertube and 4 zip ties (that is, for free):
1. Find a flat inner tube.
If you're a mountain biker, this won't be difficult! Definitely don't use a good tube... there's just no reason to.


2. Cut out the stem.


3. Wrap the drive side chainstay.


You will notice that I wrapped from front-to-back. On the next bike (I did 2 back-to-back) I tried wrapping it back-to-front and it provided a much cleaner looking wrap. This one still works great, though.


5. Trim the excess tube.


6. Zip-tie both ends of the tube to prevent it from unraveling.


7. Go mountain biking!


From now on your singletrack experiences will be much quieter and your frame will be protected from damage!


I have had people recommend that I use a thick tape as a chainstay protector, and I have one of my bikes set up this way. While it does seem to protect the chainstay reasonably well, I'm not really sure how well it will perform over the long-term, and it doesn't do much to eliminate the noise pollution factor.

What do you think? What is the best solution for chain slap?

Read more...

Wednesday, August 24, 2011

Colorado Day 4: Lower Loop, Crested Butte, Colorado


Click on over to Singletracks.com to read my photo-heavy ride report from the Lower Loop!

Read more...

Monday, August 22, 2011

Wood's Trail Video, Crested Butte Mountain Resort, Colorado


Be sure to check out the massive wall ride!

Read more...

Friday, August 19, 2011

Colorado Day 2: Foothills Trail, Loveland, Colorado

Getting There

From Fort Collins:
Find County Road 21/South Overland Trail that runs along the west side of the city. Turn off of this onto County Road 42C/Dixon Canyon Road. Go 0.6 miles, turn right, go 0.2 miles, and the trailhead should be on your left.

From Loveland: 
Head north 9 miles on US Highway 287 North/North Garfield Avenue. Turn left onto West Drake Road and go 3 miles. Turn right on County Road 21/South Overland Trail and go 0.3 miles. Take the first right onto County Road 42C/Dixon Canyon Road. Go 0.6 miles, turn right, go 0.2 miles, and the trailhead should be on your left.

All About the Trail
Click on over to Singletracks.com to read my Foothills Trail Ride Report!

Read more...

Wednesday, August 17, 2011

Thrifty Thrashing Tip #6: Create Your Own Trail Guidebooks

Guidebooks are essential when exploring new terrain, but they can be spendy! Fortunately, you can create your own guidebooks for free using Singletracks.com. Click over to the main article for step-by-step directions!

Read more...

Monday, August 15, 2011

Colorado Trip Day 1: Acclimation: Fly Fishing and Hiking

The drive out to Colorado was undoubtedly long and arduous. We drove straight through, taking shifts, but since we drove my truck and I was much more experienced at driving a manual than everyone else, I ended up doing about 16 out of the 24 hours of driving. Even during the time I supposedly had to "relax," I only managed about 4 hours of restless sleep.
I am notoriously bad at sleeping in vehicles, or taking naps in general. That, and I never realized how uncomfortable the back seat in my T-100 is until now.

But the reward of being in Colorado was so worth all of the effort it took to get out there!

For our first two days, we stayed with a couple of our friends who live on the Front Range. Shortly after we arrived, Rob took us out to show off his favorite fly fishing hole.

Hiking down to the fishing hole


Rob teaching Andrew how to cast a fly rod

Rob looking for the perfect fly.
Finding the perfect fly for the conditions is an art form, but I thought that just standing upright in this roaring mountain river was an accomplishment.


I initially planned to take a crack at the fly rod, but after I began to lose feeling in the lower half of my body from the frigid snow melt, I decided that I was good with just a few pictures.

There were some cool rock formations and hills around though... one of them just needed to be hiked!

Standing on top of a rock formation
View of the river from the rock.
View up the valley/canyon to Estes Park. You can barely make out some snow-covered peaks in the background.
One of these spiky bushes stabbed me in the foot and drew blood. Not cool!
The view was so worth it, though!


Rob and Andrew getting out of the river. Trying to walk in that rushing current was no easy task!


Well, it had been a very long couple of days and it was definitely time to head back down the mountain and get some supper!

We were heading out to the car, tired but happy. Rob was leading the group with Stacy following behind, Summer a little ways behind her, I was following directly behind Summer, and Andrew and Sydnah were further back. As we were walking along the trail seen in the second picture, Summer passed a rock and the next series of events happened in an instant:

I heard a startled hiss and a rattle and Summer screamed and danced back from the rock. I spotted the rattler lying on the left side of the trail reeling back to strike, his white mouth stretched wide open with his fangs ready to sink into her flesh, tongue flickering. I quickly jumped back as well, and yelled for Summer to get further back.

Wow, the second rattlesnake encounter in about 2 weeks, over 1,500 miles apart!

Click on image for larger view.
Unfortunately, this one was a much closer call than the first! But the common saying about snakes being more afraid of you than you are of them really is true. As soon is we jumped back and gave him his distance, the snake lowered down into a coil, and then slithered off the trail in the other direction. It was very close, but the rattle and hiss did give us enough warning to get out of the way and give him his space.

As he slithered off, Rob asked, "Do you want to kill him and cut off his rattle?"

I immediately responded with a venomous "HELL NO!" I didn't want to get anywhere near that snake again! Like I mentioned in my last post on snakes, I find the thought that something so small can be so dangerous extremely disconcerting. I was just glad that no one had been bitten, and I was more than happy to leave the snake well enough alone!

Coming Up: Day 2: Hiking in Eldorado Canyon

Read more...

Friday, August 12, 2011

Video of the Luge Trail at Crested Butte Mountain Resort

Chasing Christian Robertson, the manager of Evolution Bike Park, down the Luge Trail.

Read more...

Wednesday, August 10, 2011

Thrifty Thrashing Tip #5: Buy Take-Offs

While some tires can be salvaged, this
one is totally shot! Photo Credit
During the last tip on riding your tires until they're bald, I promised a thrifty way to replace your tires. That method is to buy take-offs.

See, this is what people with money sprouting out of their ears do: they buy new mountain bike tires, go out and ride them for a couple hundred miles until they start to look a little bit worn, and then they take them off and buy new ones. These slightly worn tires with plenty of life usually end up cluttering up said persons garage, or hanging on a peg in the storage room of your local bike shop.

Usually, these tires will sit there for so long that the person will want to just get them out of their garage or out of their bike shop and will sell them to you for dirt cheap, or they might actually just give them to you to clean things out.

Lots of times, these tires have tons of life left in them and are just looking for someone to love them!

Go to your LBS and adopt some poor, abandoned tires today!

Read more...

Monday, August 8, 2011

Five Bikes, One Car

Guest Post by AJ Heil

"June 17-19 bike trip to Copper Harbor. We did not want to take two vehicles. In order to be more efficient and to save on precious gas money we decided to cram everything into one car for the trip. To say the least, it was a bit crowded. But hey, we made it work very well!"


Read more...

Friday, August 5, 2011

The Ultimate Switchback Feature

Guest Post by AJ Heil.


"This feature is located just off of the IMBA Epic Route at Copper Harbor, MI on a trail called 'On the Edge.' Very recently installed (less than a year old). Photos - July 18th, 2011"


Read more...

Wednesday, August 3, 2011

A Couple Points on Mountain Biking Etiquette

This guest post is by Stephen Carhart.

This month I have come across some bad etiquette from other riders. Knowing some of these riders, I know that it probably wasn't on purpose, and I bet they didn't realize how this effects other people's ride.

Broken carbon 2Niner frame

This past weekend for example, a group of my buddies were on a long Mt bike ride. There were about 70 people at the start of this ride. The course was over varying terrain - single-track, fire road, steep uphills, steep downhills and nearly everything else in between. One of our buddies is stronger in leg strength, but is still developing in off-road technical bike handling. So, we would ride awhile, then 1 of us would pause and wait on the other 3 to catch up and re-group.

This helps to make sure that if there is a problem someone is there to help you out. We wanted to make sure no one got a flat, everyone is following the same route and that no one crashed and needs assistance or actual medical help. But, it is also a chance to catch our breath, talk about fun sections, and any crashes and/or near misses that just happened.

BERMS!

The problem was once we got onto the last 5 miles and less technical section of this course, our buddy proceeded to drop the riders that had just waited on him for the previous 25 miles. Although nothing was said, it was bad etiquette to not wait on us, when we had waited on him and stayed together as a group.

Another time I was riding with a friend on a trail that I had never ridden before. After a few miles, I realized that my front rotor was rubbing - I said 'hold up for a sec'. I stopped for a second to readjust the front wheel and proceeded, I guess she didn't hear me, but I figured I would catch up. I went a short distance and came to an intersection. I had no idea which way my friend had gone - so I just stayed there. A couple minutes later my friend showed back up.

Friendly bike rack

When Mt biking, here are some tips to keep everyone together and safe.

1) Always stop at intersections or at least make sure at each intersection that everyone makes the correct turn.

2) If you come to an intersection and don't know which way to go - just stay there, that is better than getting lost, and people having to search for you.

3) On long uphills and or downhills, occasionally check that the person behind you is ok. Sometimes I just look over my shoulder, sometimes I will stop and regroup to ensure everyone is good.

4) If you encounter other riders stopped on the trail, check to ensure that they don't need assistance because at some point it will be you that would like someone to check on you.

5) When passing riders going in the opposite direction, it is courteous and safer to mention how many other people are in your group, that way they will know there are more riders up ahead, thus potentially avoiding a head-on collision.

6) I have a bike Bell. Several reasons - it warns bears and horses that a human is near, alerts other mt bikers while going around blind turns, alerts other mt bikers that I want to pass, and lets other riders know that I'm Freaking Enjoying the Ride!

Stephen Carhart is an avid cyclist who rides on both the road and the trail. He writes about how to become a fitter, stronger cyclist on his blog StrongerCyclist.com

Read more...

Tuesday, August 2, 2011

On Test: Ibex Asta Pro


I'm currently testing an Ibex Asta Pro out for Singletracks.com. Click on over to read my unboxing/first impressions post.

Read more...

Monday, August 1, 2011

Wendy's Top 10 Favorite Products

The following guest post is by Wendy Davis.

I am always curious about what other athletes use to make their lives and bike rides easier. I have my top 10 to share with you. There are links, where to buy, and prices listed if you are interested in acquiring some of them. In random order......

Kuat NV 2 Bike Rack

This bike rack is beyond awesome.  I don't own one yet, but have been "testing" one of my friends'.  I love the fact that it can fold down, with bikes on, so you can get in your car.  The rack also has a built in bike repair stand called the "Trail Doc."  Kuat offers an add-on to accommodate two more bikes. Selling for around $500, plus or minus, this is an investment.  I will begin selling my blood to acquire one. See your local bike shop to order.


Platypus Bottles
These Platypus bottles are reusable, collapsible, and  hold 34 oz.  We used them at Dirty Kanza to refill our bottles and use them on every bike pack trip.  You can buy them at Alpine Shop or Backwoods for around $8. They also sell attachment hoses if you want to use them as a bladder in your pack.

My Buff
 Whether you have hair or not a Buff is handy to have.  There are many uses, but I use it primarily to protect my head from sunburn and keep the bugs from buzzing my ears.  It's a great headband and fits under my helmet easily.  It absorbs moisture and breathes well.  Cost is around $20.

My weekend essentials.
 A freezer bag is the perfect size for everything I need, plus it's see-through. Bullfrog Mosquito Coast is sunscreen and bug spray in one {$ 5- $10}. Travel size toothbrush and paste ( $1 ). Benadryl Itch stick ( $2 Target) Dr  Bronners to freshen up with ($ 2 Target ) Tecnu for washing off poison ivy and such, tube of EZ Towels ( $5 for 25 ) and Coppertone Ultra sweat proof Sunscreen ( $1 travel size ).

1.5 Gallon Sure Spray
Picked this up at Home Depot for $10.  Perfect to spray yourself down after a ride or trail work or clean off your bike/gear before putting it in your car.  This item has paid for itself already.  When you are out in the middle of nowhere and need a shower, this is it.  They make 'em bigger, too.   

Aaahhhh  the Halo
No one likes burning sweat in their eyes. I do not ride or run without my Halo headband.  The rubber strip/gasket keeps it in place and channels the sweat back beyond my eyes.  There are a wide variety of colors, and don't expect the white one to stay white. They can be found at your LBS (Local Bike Shop), online, or at a local outdoor retailer.  It wicks moisture and I don't even know it's under my helmet... but I definitely know if it's not!

ByeKyle Strap
I own several of these ByeKyle  straps and am very pleased with them.  They come in several colors and custom colors are available.  At a mere $7 apiece they are a great deal.  I use mine to hold an extra tube, Co2, and tire lever on my bike. I used one in a 24 hr race and it didn't budge.  We have also used them to strap gear to our packs in Adventure races. If you buy one you will regret it--buy at least 2.    (Ahem, Team Seagal Sponsor!) 

Jif travel size
Peanut Butter on the trail!!  Very durable packaging and convenient size to take anywhere.  These come 8 to a pack for about $2 at Target.  All you need is a bagel, pretzels, or an apple and you have a great portable snack. Pop them in a pack or your jersey and enjoy.

2XU Compression stuff
 After a long ride or a week packed with miles, I deserve to have a speedy recovery so I can get back at it.  Besides just feeling absolutely wonderful, they help to reduce muscle fatigue and ensure a quick recovery.  2Xu has many other products to offer. MEN    WOMEN      Don't get your calve sleeves mixed up with your arm sleeves--it's not good. These start out at $50 in price and go up. 

"Sometimes the body needs a little help."  Eric McKenna said this as we walked to the 2XU tent at Sea Otter.  He was correct.

ENO gets a thumb's up
This hammock is more comfortable than  my Sleep Number. The Doublenest is great for one to chill, but the Eno Double Deluxe is where it's at.  With a weight capacity of 400 lbs, two can snuggle or one can spread out. The hammocks weigh about a pound and take less than 2 minutes to set up.  We take them backpacking and bike packing. All you need is trees.  This link to the Alpine Shop can help ya swing. They also make bug shields if ya need.

Well, there you have it!  Have a favorite of your own to share?  Leave a comment.

 I am Wendy Davis aka Sasha, currently a stay at home mom riding mountain bikes in Missouri.  I ride for the Airborne Flight Crew and Team Seagal.  Stop by my blog anytime. I can be quite entertaining as I find my way down the trail.

Read more...

Labels

Counter

Blog Archive

About Me

My photo
Greg Heil is the Editor in Chief for Singletracks.com. He's been writing and publishing online since before blogging existed.

About This Blog

Mountain biking, plain and simple. Trail reviews, ride reports, and philosophical musings induced by delirium from grinding up way too many vertical feet.

Read More

  © Blogger templates The Professional Template by Ourblogtemplates.com 2008

Back to TOP